

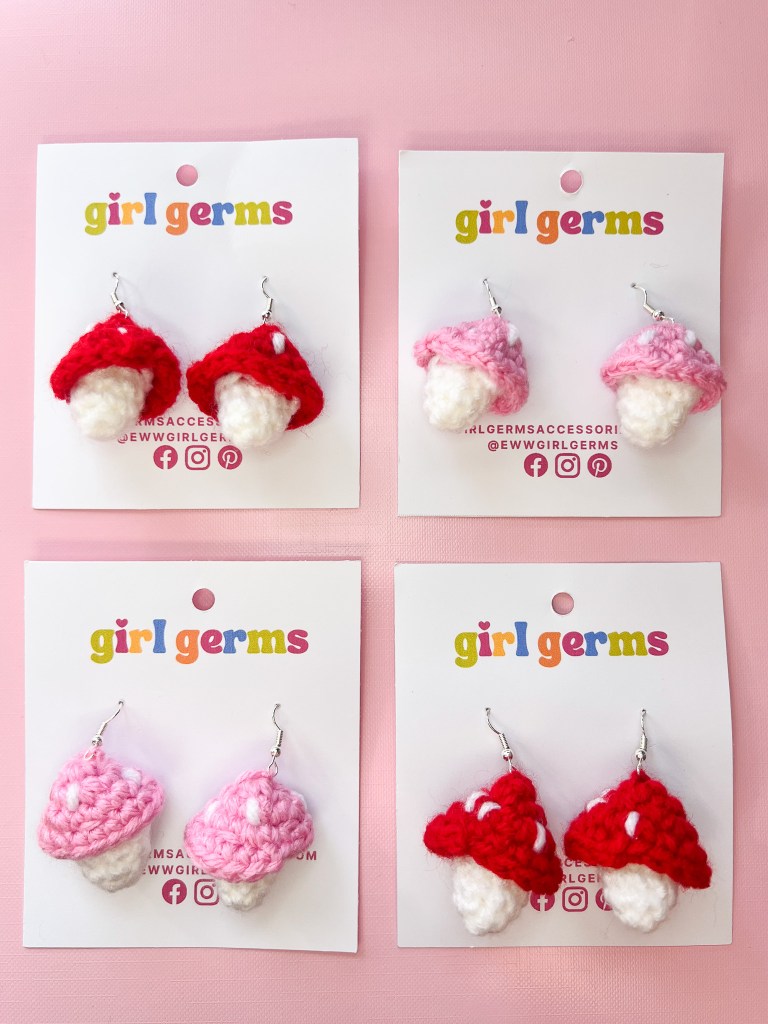
If you can single crochet in the round, you can make these lil’ mushrooms — seriously. With just 8 quick rows and a sprinkle of stuffing, they come together fast and are beginner-friendly without being boring. While I turned mine into earrings, they’d also make adorable mushroom keychains, plushie pals if you size up the yarn, or sweet little accents on whatever you’re stitching up next. The possibilities for these little guys are endless!
Mushroom Earrings Crochet Pattern
Materials Needed
- Small amount of red yarn (or your preferred cap color!)
- Small amount of white yarn
- Earring hooks (I prefer nickel-free)
- 2.00 mm crochet hook
- tapestry needles
- scissors
- stitch marker (I use a bobby pin!)
Sizing Information
Gauge is not important for this pattern. My finished mushrooms measure about 2 inches tall and 1.5 inches wide.
Abbreviations (US Terms)
- Mr = magic ring
- Sc = single crochet
- Ss = slip stitch
Mushroom Cap
Both the cap and stem are crocheted in the round, meaning you don’t need to join your work with a slip stitch at the end of each row.
- With your desired mushroom cap color, sc 6 into a mr. Pull tight to close.
- inc x 6 (12)
- (sc 1, inc) x 6 (18)
- sc in all stitches (18)
Ss in the first stitch of round 3 to close. Leave a long tail for sewing.
Before moving on to the stem, use white yarn to randomly embroider white spots on the mushroom cap. My spots were one stitch tall, and I included 5 spots on each cap. Tie off the yarn on the inside of the cap and cut the ends.
Mushroom Stem
- With your desired stem color, sc 6 into a mr. Pull tight to close.
- (sc, inc) x 3 (9)
- sc around (9)
- sc around (9)
Ss in the first stitch of round 3 to close. Weave in ends (or use them to lightly stuff the stem!)
Finishing Touches
Cut a 6-inch piece of yarn in a color that matches your mushroom cap color. Using a small crochet hook (I used a 1mm) or your fingers, pull the yarn through the wire loop at the bottom of the earring hook. Tie a knot to secure the yarn in place. You now have two tails hanging down from the earring hook.
Use a needle to thread one of the yarn tails through the first row at the top of the mushroom. To do this, insert your needle into any stitch within the top 6 stitches of the mushroom cap and bring it through to the stitch directly across from it.
Next, remove the first tail from your needle. Thread the other tail and Insert it through the same two stitches, but from the opposite side.
You should now have both yarn tails coming out on opposite sides of the top row. Pull them snug so the earring hook sits flush with the top of the mushroom. Weave each tail in for a couple of stitches so they exit at the same spot on the mushroom cap. Tie the ends in a double knot, and use your tapestry needle to tuck the knot inside your work.
And there you have it! Just eight rows and a litle bit of sewing later, you’ve got a cute little mushroom earring. I hope you had as much fun making it as I did!
If you made something using this pattern, it would make my day to see it! Feel free to message or tag me on social media — I’m @ewwgirlgerms everywhere.


Leave a comment